
Showing posts with label scrapbook inspiration. Show all posts
Showing posts with label scrapbook inspiration. Show all posts
Tuesday, January 26, 2016
Scrapbooking Process Video Hop
I really love making scrapbooking process videos. I'm streamlining my process so I can create them more often. Today I'm thrilled to be participating in a scrapbooking process video hop with some amazing scrapbookers. I can't believe my name is on this list. Yay!


Tuesday, July 8, 2014
Let's Talk Tuesday: Handstitching 101
I've gotten lots of questions and comments about the hand stitching that I've done on a lot of my projects recently so I thought I'd do a post all about hand stitching!
 Until recently I've done all my hand stitching on my own, without a template. I'd draw a simple shape with a pencil prepoke my holes and then stitch away. This is how I did the stitching on this layout:


For this layout I used a die cut as a template. I prepoked the holes around the die cut and then stitched.


 On this project I used a stitching template from American Crafts. These are one of the more expensive tools that I have on hand but I must say they are worth every penny. They make hand stitching so fun and so EASY.

 Aren't those leaves adorable? They're a little more than I wanted to draw so I used a template.
 And last but not least remember that you can always draw or write what you'd like to hand stitch. All you have to do is write on your piece of paper lightly with a pencil, then poke the holes and then erase the pencil marks before you stitch. Poke holes closer together to make a curve and further apart when you're making a straight line.


Here are a few tips to make your hand stitching successful:


For this layout I used a die cut as a template. I prepoked the holes around the die cut and then stitched.
Here are a few tips to make your hand stitching successful:
- Always prepoke your holes (use either a needle or a paper piercer).
- Split a strand of embroidery floss in half (so you'll be using 3 threads). If you use all 6 threads at once it may tear the paper.
- When you start stitching tape the thread to the back of your page to hold it in place, tape the end of the thread when you finish as well.
Tuesday, May 13, 2014
Let's Talk Tuesday: Journaling on a photo?

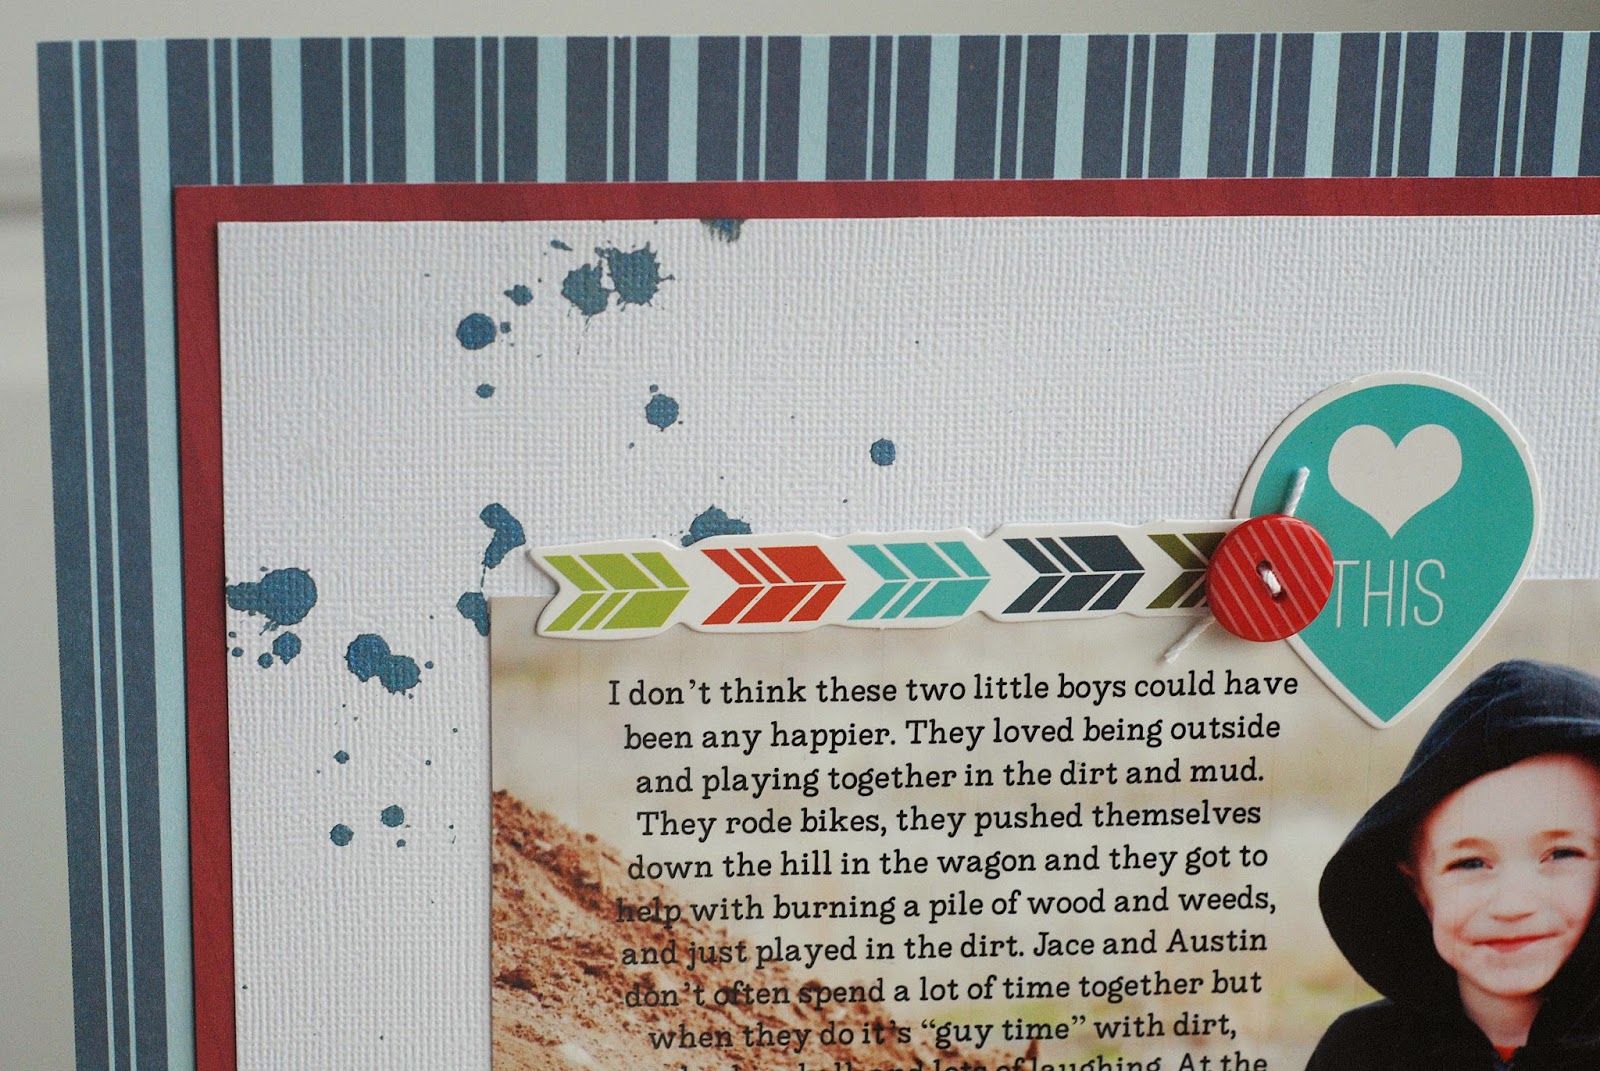
My husband took this photo of my little man. I was at a meeting while the boys were out playing in the dirt. I immediately fell in love with the photo. When I started working with this photo I really wanted to add my journaling right on the photo.
There are a few ways to do this:
- You can add the text in most photo editing programs by typing in a text box on the photo (I use Photoshop Elements.)
- You can print on the photo just as you would print on a journaling card by printing the journaling on a plain sheet of paper and then adhering the photo to the paper on top of the journaling and then run it through your printer again.
- If you love the look of journaling on the photo you can print your journaling on a transparency and then lay the transparency over the photo.
On this layout I printed the journaling at the same time I printed the photo by adding the text in Photoshop


Have you ever written or printed your journaling directly on the photo? I'd love to see your project. Leave a link in the comments.
Thanks for stopping by today!
Tuesday, May 6, 2014
Let's Talk Tuesday {Lines}
If you're looking for the American Crafts Blog hop & GIVEAWAY you can find it HERE
Hey there! I'm so glad you stopped by today! Today I'm starting a new blogging series called Let's Talk Tuesday
 In this series we'll talk about anything and everything related to scrapbooking (including but not limited to); design, product, tools, and techniques. I would love to feature your questions and comments in this series. Please click the "contact me" button to the right if you have any questions or comments.
The first topic for Let's Talk Tuesday is lines...
Lines you ask? Yes, lines. When I create a layout the first thing I think of is where do I want my line of focus and which direction do I want my line to go. Then I start creating a line with my photos, embellishments, and journaling across that line on my background paper.
My goal is to always have a line (or lines) to draw the readers eye across the page. I also try to add the focal point of the layout (usually the photo) directly into the line or very close to the lines.
I drew lines in Photoshop to a few of my older layouts to show you what I'm talking about. Let me show you some examples of a horizontal lines:
 This layout draws the eye across the page with the line of question marks to the right and left of the photo.
 On this layout I wanted both the title and the main photo to be on the horizontal line.
 On this one the photo and the main embellishments (the circles and the flower) are on the horizontal line.
Next, let's talk about diagonal lines. This is probably my favorite way to design and the way I design most often. Starting at one corner and working my way to the opposite corner with the focal points of the layouts falling very close or directly on the line.
Here are a few projects that start on the top left corner and go all the way to the bottom right corner:
 My main photo and title are both on the line.
 The photo in this one is right on the line with the title falling just under the line. The embellishment clusters draw the eye on the diagonal line.
 All three major elements of this layout are on the line; the title, the photo, and the title.
Here are a couple of examples of layouts that start at the top right and go to the bottom left:
 Once again on both of these layouts it's the embellishment clusters that lead the eye across the page.

Sometimes when I create layouts that are a little more complex I create more than one line. On these two layouts I created three lines with my focal points laying on at least one of the lines:
 This layout has the title and the photo within the lines. The journaling is outside of the lines but I wrote it with a silver pen so that it didn't distract from the photo and title. I wanted the focus to remain on the silly photo of my niece.
 When I create a project that has three embellishment clusters I *almost* always make sure my title, photo, and journaling are touching or are within the three lines. That is the case with this layout. *just a little note, this is probably my all-time favorite layout*
I hope you learned a little bit about lines today and how they work. Please let me know if you have any questions or suggestions for "Let's Talk Tuesday" Simply click on the "contact me" button that is to the right and I'll get back to you ASAP!
Hey there! I'm so glad you stopped by today! Today I'm starting a new blogging series called Let's Talk Tuesday

The first topic for Let's Talk Tuesday is lines...
Lines you ask? Yes, lines. When I create a layout the first thing I think of is where do I want my line of focus and which direction do I want my line to go. Then I start creating a line with my photos, embellishments, and journaling across that line on my background paper.
My goal is to always have a line (or lines) to draw the readers eye across the page. I also try to add the focal point of the layout (usually the photo) directly into the line or very close to the lines.
I drew lines in Photoshop to a few of my older layouts to show you what I'm talking about. Let me show you some examples of a horizontal lines:
Next, let's talk about diagonal lines. This is probably my favorite way to design and the way I design most often. Starting at one corner and working my way to the opposite corner with the focal points of the layouts falling very close or directly on the line.
Here are a few projects that start on the top left corner and go all the way to the bottom right corner:
Here are a couple of examples of layouts that start at the top right and go to the bottom left:
Sometimes when I create layouts that are a little more complex I create more than one line. On these two layouts I created three lines with my focal points laying on at least one of the lines:
I hope you learned a little bit about lines today and how they work. Please let me know if you have any questions or suggestions for "Let's Talk Tuesday" Simply click on the "contact me" button that is to the right and I'll get back to you ASAP!
Thursday, April 24, 2014
One of *Those* "Mommy Moments"
I remember the moment I took this photo so clearly. We were at a baseball game and the weather was finally nice enough that we could venture out of the car to watch the game. My two little kiddos ran out on the grass with a book and sat down.
My little girl started reading to my little guy and I had one of those nostalgic "mommy moments" where I thought, "They're growing up too fast!"
I documented these thoughts with the Plus One collection by Amy Tan for American Crafts. (aren't those black thickers amazing?!?!)

 I outlined the hearts with a black pen and put foam adhesive underneath a few of them.
 And here's the completed project:
 Squish your littles today! They don't stay little nearly long enough!
My little girl started reading to my little guy and I had one of those nostalgic "mommy moments" where I thought, "They're growing up too fast!"
I documented these thoughts with the Plus One collection by Amy Tan for American Crafts. (aren't those black thickers amazing?!?!)
Wednesday, April 23, 2014
Make Your Kids Do the Work for You
Recently my little lady has started writing in cursive. She practices her cursive writing at every chance she gets. My pens are constantly missing and I need to go buy more notebooks. She LOVEs writing. While I was working at my desk and she was sitting next to me writing away I decided to pass the journaling card to her.


 Do you involve your kiddos in your scrapbooking?
Thanks for stopping by today! I love hearing from my readers! Let me know if you have any questions or comments!
I love the authenticity it adds to my scrapbooking and I love that she can be involved in my creative process.
Thanks for stopping by today! I love hearing from my readers! Let me know if you have any questions or comments!
Tuesday, April 8, 2014
Elle's Studio and Therm-o-web
When Elle asked if we wanted to team up with Therm-o-web I was so excited. I'm always on the look out for amazing adhesives. Adhesive is kind of a big deal in a scrapbookers world ;)
Now, lets get to the project I created...
I'm guessing that most of us have a terrible photo that's taken with your phone in terrible lighting. Well, here's mine! A photo taken late at a night in a fast food restaurant with my sisters and myself isn't exactly a photo that's going to be hanging on my living room wall, but I did want it my scrapbook because it has a great story behind it.


Tuesday, March 11, 2014
February Re-cap with Elle's Studio
Hey there, I'm here to share a couple more projects with you from Elle's Studio. This first project is a recap of February. We had a busy month at our house. I wanted to document a bit of the craziness.

 And here's the completed layout. It's a very simple design with lots of journaling and 3 photos. Although you could use a lot more photos in the same amount of space.


 And here's the final project. I completed the layout with some machine stitching in a few places. It adds a lot of texture and detail.

The second project is a layout all about me. I have the camera to my kids to change things up a bit and had them take a few photos of me. The journaling was simple. I just filled out one of the Elle's Studio pre-made journaling cards.
Thanks for stopping by today! Have a great Tuesday!
Subscribe to:
Posts (Atom)