Good Morning and Happy Thursday! After a very busy Wednesday I'm happy to be spending the day at home with my littles, cleaning, cooking, creating, and sneaking in a few minutes for a few snuggles and reading some stories.
We're planning a nice quiet Summer; we'll be spending lots of time at home. Home with my little family is my favorite place to be.
Over Memorial Day weekend I created this mini album to document some of the things that the kiddos put on their Summer Bucket Lists.
I let them each choose 10 things that cost little or no money and then when we have a lazy day at home we'll check a few of the items off of their lists and take some photos.
I let them look at this list from thecraftingchicks.com
By the end of the summer they'll have an album completed with summer activities.
I left lots of room for journaling because I want the kids to do the journaling. Now that most of them are old enough to write or even draw. I love hearing their side of the story.
I can't wait to read all the stories that will be in this little book. We don't do anything elaborate or fancy for Summer Vacation but we have a lot of fun and spend lots of time as a family.
What's your favorite family Summer activity?
Thursday, May 29, 2014
Wednesday, May 28, 2014
What Do You do when your mojo is gone?
When I'm drawing a blank on designing a scrapbook project. I often turn to the technique of repeating a shape. I usually use a basic shape such as a circle, a square, a rectangle or even a star. The other day when I sat down at my desk to create a layout using this adorable photo of my mom and my daughter I just couldn't get started.
Everything I tried looked awkward and I was getting frustrated. Before I completely quit I grabbed my circle cutter and started cutting circles out of the newest Imaginisce collection Little Princess.
After I cut out several circles I decided to see how many different ways I could get the shape of a circle onto my project, so I embossed a few of the circles with polka dot embossing folders. I also used a scalloped border punch to punch a border for the top and bottom of my project.
I even put my title into the middle of one of the circles and added a few buttons in between words.
I also sprinkled a few dots of ink to add even more circles.
Here's an example of how I did something similar but this time I used squares.
This is one way I overcome a case of scrapper's block.
Have you ever tried repeating a particular shape over and over to create a layout?
Have a happy Wednesday!
share: facebook | twitter | pinterest
Labels:
circles,
Elle's Studio,
imaginisce,
little princess,
shapes,
squares
Tuesday, May 27, 2014
Let's Talk Tuesday: What to Pack when Creating on the Go
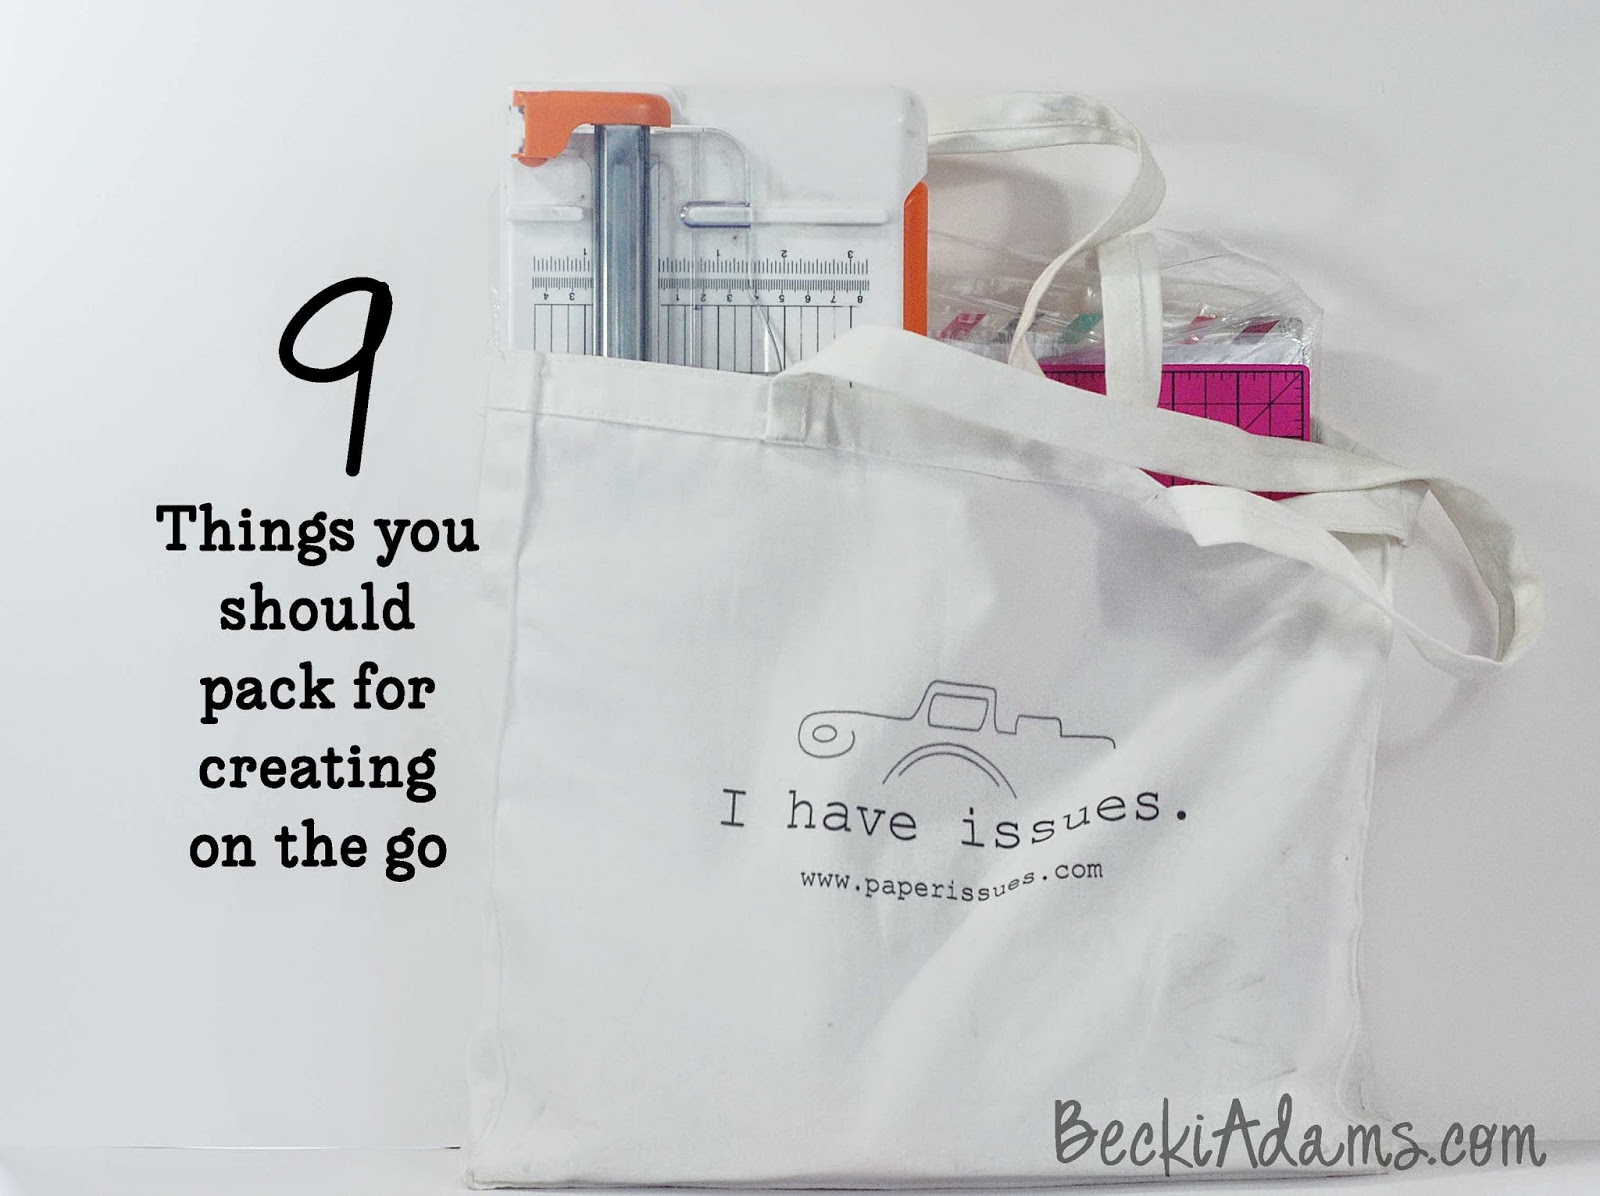
As I've mentioned before I do a lot of creating on the go. With three active kids, babysitting three more active kids, and keeping up with this amazing hobby, scrapbooking; I'm always trying to sneak in a few extra minutes of creative time. I spend hours and hours each week in the car, waiting for kids at baseball practice, or running club, or tech camp (you get the idea). While I'm sitting in the car waiting I pull out a few supplies and create. I've created many many layouts and cards (Beautiful Reasons, Book Worms & Library Rats, Always Here, Kiss Me) while sitting in the front seat of my mini van (three cheers for soccer moms).
I always keep a small bag of supplies packed and ready to go.
Here's what I keep in that bag:
How do you take advantage of your extra time in the car?
I always keep a small bag of supplies packed and ready to go.
Here's what I keep in that bag:
- Cardstock (white, kraft, black) only a sheet or two of each. These are the three colors I use the most.
- A cutting mat. I bought one on clearance at Walmart a few months ago. It's only a little bigger than 12x12 but it provides me a small surface to work on.
- Scissors. I love these ones from American Crafts. They're not too big and they're not too small...just right
- Adhesive. I keep two kinds in my bag, some dimensional foam adhesive and a small tape runner (I keep one extra tape runner refill in my bag too).
- Pens & a pencil. (One of each). I love the Becky Higgins PL pens. The pencil is just a plain ole' yellow pencil...or a spider man pencil, or a jack-o-lantern pencil, or if I'm feeling really festive a silvery glitter pencil with pink hearts.
- Paper Trimmer. I tend to stare at a piece of paper with a look of "what do I do with this?" on my face if I don't have a paper trimmer.
- Stapler (and a few extra staples). I love the new one from American Crafts.
- Small notebook. I use this for rough drafting my journaling or jotting down creative ideas or a few notes.
- A small kit. Sometimes I create my own kits or sometimes I have a recent kit from a kit club. It depends on the time. I always have one in my bag but this is the item that I switch out most often.
How do you take advantage of your extra time in the car?
Thursday, May 22, 2014
Die Cut Background {Bella Blvd}
Recently I was given the challenge to create a die cut background for a Bella Blvd assignment. I started searching for a die cut background, something with a repetitive shape (similar to the one I used HERE on the Christmas Nerds layout) but I didn't find anything that gave me the itch to create. Then I came across THIS cut file. I immediately knew I wanted to use this cut file.
I love the look of subway art and I thought I'd try incorporating it into my scrapbooking. I thought by cutting this very large title out of white cardstock and adhering different scraps of patterned papers behind each word I would have an adorable unique die cut background.
With such a large title I kept the embellishment clusters down to two.
Previously when I've browsed through the Silhouette Store I've passed by the larger cut files. I've started to pay a little more attention since I created this project. I'll be using larger die cuts for my backgrounds in the future.
Have you used a large cut file for your background? I'd love to see it. I've been pinning a few ideas. Leave a link in the comments, I'll make sure to pin yours!
Wednesday, May 21, 2014
Easy {Gluten Free} Almond Joy Rice Krispy Treats
Here's what you'll need. (these can also be made not "gluten free" by using plain ole' rice krispies. This is how I made them while photographing this recipe. They were for my kids, I decided to save the Gluten Free Rice Krispies for me...I'm selfish like that.)
Hello, I'm taking a little detour from my usual scrapbooking blogging to share a recipe with you.
First of all, I'll give you a little bit of background on how I came up with this recipe.
In October of 2013 I was frustrated because I was feeling awful all.the.time. It seemed like everything that I ate made me sick. I was venting my frustrations to a friend of mine and she suggested that a lot of people who have autoimmune diseases (you can read a little bit more about my diagnosis HERE) benefit from a gluten free diet. I quickly explained to her that my Dr. had already tested me for Celiac's Disease and the test came back negative. She said that it was worth a try..."try it for 30 days" was her comment. So, mostly out of desperation I tried it. It was a hard 30 days. I pretty much hated every minute of it! I tried lots of "gluten free" recipes with all sorts of weird flours.
After the 30 days I went back to my normal diet. After a few days I started to feel miserable again. Much to my dismay I went back onto my gluten free diet and have been that way ever since. Now, with that being said, I do cheat on my diet. Not very often but I do cheat. I always regret it but I do cheat once in a while.
Anyway, I'm always looking for a gluten free recipe that doesn't taste like it's gluten free and doesn't require ingredients that are impossible to find.
While I was playing around in the kitchen the other day I came up with this recipe for
Easy Gluten Free Almond Joy Rice Krispy Treats
- Rice Krispies (gluten free or regular)
- butter
- coconut
- coconut extract
- salt
- chopped almonds
- chocolate chips
- marshmallows
Step one: melt butter and marshmallows on LOW heat in a heavy dutch oven
When your marshmallows and butter are melted it's time to add a few little extras.
Step Two: remove pan from the heat and then add the coconut and coconut extract.
(Now, cue the handsome little man running around in ninja turtle/spider man pajamas to be your extra set of hands)
Step Three: Add the rice krispy cereal. Quickly, stir it all together
It should look something like this:
Step Four: Press rice krispy mixture into a 9x13 pan. *tip* when pressing rice krispy mixture into the pan run your hand under cold water before pressing to prevent the treats sticking to your hand.
Step Five: Pour chocolate chips into a microwave safe bowl and microwave until melted stirring every few seconds so they don't burn.
Step Six: pour melted chocolate on top of treats and sprinkle with chopped almonds.
That's it, six easy steps! If you're like me and can't wait for the chocolate to set up you get really messy. Otherwise, you can put them in the fridge while the chocolate cools.
This is what I'm making to take to our Memorial Day BBQ's. I'm sure they'll be a big hit! Give this recipe a try! You'll become a pot luck hero!
Here's the full recipe:
6 cups Rice Krispies
4 tbs butter (please don't use margarine, you'll be sad if you do)
4 cups miniature marshmallows
2 tsp coconut extract
1 cup coconut
pinch of Kosher salt
1/4 cup chopped almonds
1 bag milk chocolate chips
Have a great holiday weekend! Thank you for stopping by my lil ole' blog.
Tuesday, May 20, 2014
Let's Talk Tuesday: One Photo Layouts
One photo layouts can be a controversial topic in the world of scrapbooking. Many scrapbookers think that using one photo is a waste of a layout/supplies/space in the album. Although these may all be true, one photo layouts take up the bulk of my creations. I know many of you may not agree with my choice to create layouts with one photo but it's my style and it's what I love.
Here are a few reasons why I choose to create with one photo:
- One photo often tells the story. Most of my projects are about everyday moments. I don't create around big events. For example on this project I documented a conversation between my son and I about reading. I quickly snapped a photo of him reading. The moment was over after I took the one photo and I was left with one photo and a few notes from our conversation.
- Sometimes there isn't a photo to go with the story that I want to tell. On this project I wanted to tell the story of my daughter leaving little love notes all over the house for me. I didn't have a photo of the exact event so I included the most recent photo of the two of us along with one of the notes she had left on my desk.
- And sometimes, one photo just tells it all. I don't feel like I need any additional support from more photos. Sometimes I just want the attention to be on a single photo. I had many many photos of my niece in her skunk costume but none of them caught my eye like this one did. It melted my heart and I wanted all the focus to remain on the adorable smile she had on her face.What do you think? Is one photo enough or do you prefer a layout with many photos? That's one thing I love about scrapbooking. There isn't a right or a wrong answer. You can add as many photos as you want OR you don't even have to have photos on your projects if you don't want them.What's your opinion on this scrapbooking controversy?
share: facebook | twitter | pinterest
Labels:
#ltt,
Lets Talk Tuesday,
one photo layouts,
photo choices
Monday, May 19, 2014
There are so Many Beautiful Reasons to be Happy {Bella Blvd}
The first manufacturer I designed for was Bella Blvd. They are so amazing to work for and I adore Stephanie's designs! I love bright colors and the bold graphic design in their products. Their mid season release is now hitting stores. I've been playing with it for a few days now and have had so much fun! Here's what I came up with when I was challenged to create a layout using the new collections. I mixed two collections (Classic Calendar & Scattered Sprinkles) to come up with this layout:
The blue portion behind the title is done with gelatos. I wanted to put an extra emphasis on the word "happy." The title was fussy cut from the 'B' side of this piece of patterned paper:
The new collections are arriving at the Paper Issues Store. You can find all of them HERE
If you use the code becki20 when you check out you'll get 20% off your entire order.
Here are some detail shots of this layout. (funny side note: I created most of this project while sitting in the car watching my little man's little league game. It was awful weather so I stayed in the car and fussy cut the title while I watched...how's that for multitasking! ;)
Thanks for stopping by today! Happy Wednesday!
share: facebook | twitter | pinterest
Labels:
3 kids,
baseball,
Bella Blvd,
fussy cutting,
gelatos,
Little League
Wednesday, May 14, 2014
NSD American Crafts Blog Hop *WINNER ANNOUNCED*
Happy Wednesday! I'm just dropping in today to announce the winner for the American Crafts National Scrapbook Day Blog Hop *WINNER* I'm so excited to tell Linsey that she is the winner of the $20 Gift Certificate to the Paper Issues store. Congrats Linsey! Please email me using the Contact Me button to the right with the subject line "NSD Blog Hop Winner"
Thank you to everyone for playing along!
share: facebook | twitter | pinterest
Labels:
#NSD2014,
American Crafts,
gift certificates,
Paper Issues,
winner
Tuesday, May 13, 2014
Let's Talk Tuesday: Journaling on a photo?
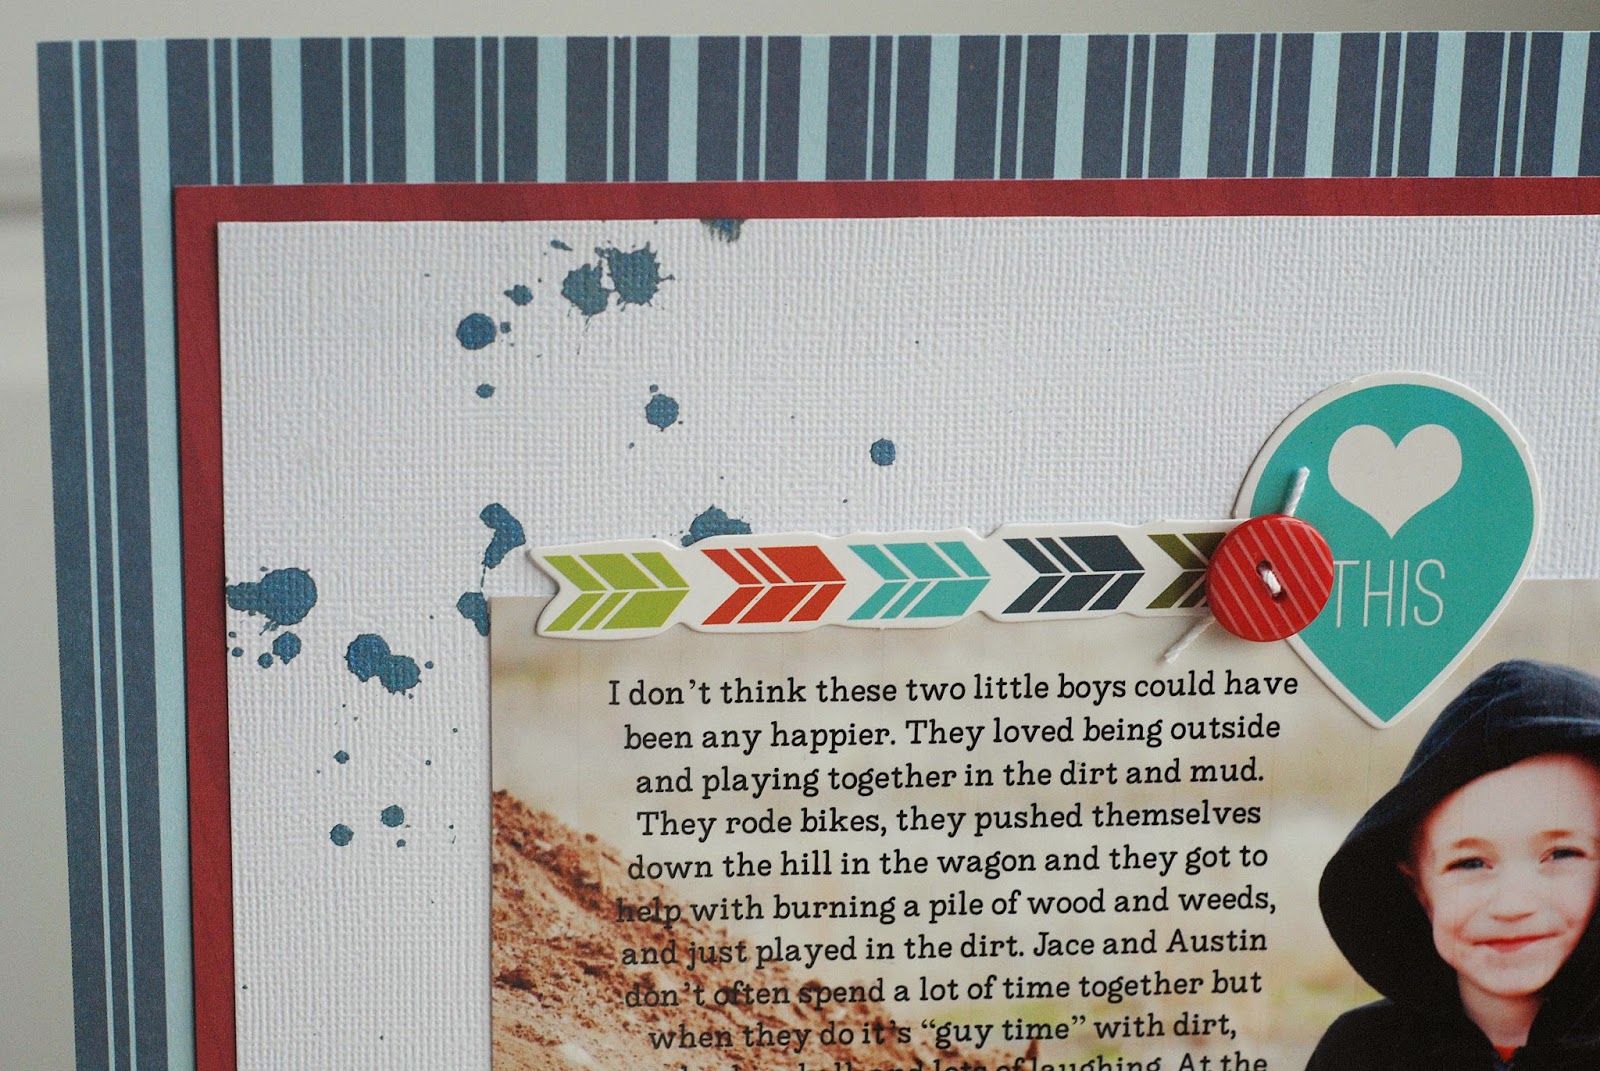
Have you ever journaled on your photo? Until recently, I hadn't either. After creating this layout I fell in love with this technique!
My husband took this photo of my little man. I was at a meeting while the boys were out playing in the dirt. I immediately fell in love with the photo. When I started working with this photo I really wanted to add my journaling right on the photo.
There are a few ways to do this:
On this layout I printed the journaling at the same time I printed the photo by adding the text in Photoshop
I used the Imaginisce Perfect Vacation line for this project. I don't have a ton of travel photos but I do have lots of little boy photos. The colors and patterns in this line are perfect for little boys too!
Have you ever written or printed your journaling directly on the photo? I'd love to see your project. Leave a link in the comments.
Thanks for stopping by today!
My husband took this photo of my little man. I was at a meeting while the boys were out playing in the dirt. I immediately fell in love with the photo. When I started working with this photo I really wanted to add my journaling right on the photo.
There are a few ways to do this:
- You can add the text in most photo editing programs by typing in a text box on the photo (I use Photoshop Elements.)
- You can print on the photo just as you would print on a journaling card by printing the journaling on a plain sheet of paper and then adhering the photo to the paper on top of the journaling and then run it through your printer again.
- If you love the look of journaling on the photo you can print your journaling on a transparency and then lay the transparency over the photo.
On this layout I printed the journaling at the same time I printed the photo by adding the text in Photoshop
I used the Imaginisce Perfect Vacation line for this project. I don't have a ton of travel photos but I do have lots of little boy photos. The colors and patterns in this line are perfect for little boys too!
Have you ever written or printed your journaling directly on the photo? I'd love to see your project. Leave a link in the comments.
Thanks for stopping by today!
Subscribe to:
Posts (Atom)