Do you like to create your own embellishments? I love to but I don't often take the time to do so. Recently, I did take the time to create my own fabric feather embellishments. I used the Spellbinders Platinum 6 die cut machine and the birds of a feather die. I had so much fun creating them I created WAY too many of them. (I've added the extra feathers to my stash so watch for more projects with these cute little feathers.)
After I created the embellishments I added them to a scrapbook layout. You can see this entire layout come together with the feather embellishments on my YouTube channel:
I LOVE how this layout (with handmade embellishments) came together.
If you haven't done so before, you should try making your own embellishments. Thanks for stopping by today. I'll see you again soon :)
Welcome!! I'm glad you found your way here. You should have arrived here from the awesome Catherine Scanlon's blog. World Card Making Day is right around the corner. In fact, it's tomorrow! I love that there is a day to celebrate the art of card making. There's nothing quite like receiving a handmade card in the mail. I love to feeling of knowing that I'm making someones day by sending them a little bit of happiness when I send a card that I made.
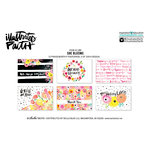
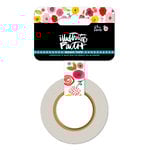
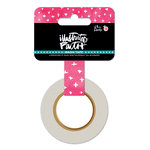
The Bella Blvd creative team and the Cardmaking Magazine team have a really fun blog hop for you today. I created a card with lots of fun products from Bella Blvd and Illustrated Faith. I created the base of the card with white embossed cardstock. Then I mixed a little bit of white paint and dark pink paint to create a lighter shade of pink. Then, I dry brushed the front of the card.
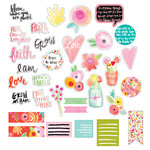
The main embellishment cluster and the sentiment are in the bottom right corner of the card.
The sentiment for this card is a sticker. I simply added foam adhesive to make it stand out a little bit. I think it's a pretty powerful sentiment, "let your faith be bigger than your fear," I wanted to make sure that the design of the card didn't detract from the sentiment.
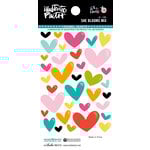
Another way I made sure that the design focused on the card was to create a string of dark pink hearts leading right to the sentiment. This card was really easy to make, with drying time, it took me less than 45 minutes.
Thank you for stopping by my blog today. I'd love to have you come back soon. Make sure you sign up for my newsletter so you don't miss any of my upcoming events.
What cards are you creating for World Cardmaking Day. I'd love to see your cards. Leave a link in the comments, I'll make sure and stop by! Now you're off to see what the incredible Daniela Dobson has created for you. Thanks for stopping by!
This post contains affiliate links for more information visit my disclosure page
Hey friends. I'm excited to finally share with you my first video as a video contributor for Bella Blvd. My first video did not go as smoothly as I hoped it would. I created a layout/video, I loved it. I was so excited about it and then my hubby started to edit it and the video cut out for most of the layout. I had the beginning and the ending of the video but nothing in the middle. While, it probably would have been okay to upload it, I just couldn't. I still have the video and layout. I will probably share them at some point but for now, I'm thrilled to share this layout and video with you.
At the beginning of this video there is a short introduction so you can see "the face behind the voice." I actually filmed my face. This doesn't happen very often because most of the time when I'm filming I'm wearing my yoga pants, no makeup, slippers, and I may or may not have brushed my hair that day (just keepin' it real, folks). So on a day when I was filming AND I actually looked presentable I decided to introduce myself.
Here's the layout I created:
This is NOT the most flattering photo of me (remember when I said that most of the time I'm in yoga pants, no makeup, and uncombed hair) yeah, this was one of those days. BUT I can't resist taking a few selfies when my nieces ask me to. Honestly, I can't resist any request from my nieces but that's another story for another day.
Come watch and see how this layout comes together and see how I "make it work" when I mess up on a layout.
If you haven't done so already, please subscribe to my YouTube channel. Thank you! Have a great Friday and a great weekend! I'll see you all next week!
It's Friday and I'm hanging out with some of the most amazing ladies you'll ever meet at the Snap Conference. I always look forward to this conference. I learn so much and meet so many wonderful people AND get spoiled rotten by all the amazing sponsors. I do also feel VERY inadequate. My lil ole blog is one of the masses and needs SO much work.
In other news...
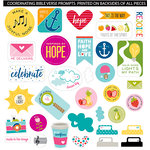
It's freebie Friday over on the Bella Blvd blog and I've got a layout on there that has A LOT of chipboard. I have a bit of a chipboard obsession (as evidenced by the huge basket of chipboard in my stash). I think that even with a ton of chipboard this layout turned out GREAT.
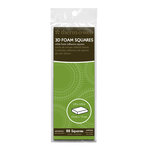
The secret to layering chipboard is dimensional foam adhesive dots. I use these all the time to make my chipboard embellishment clusters work.
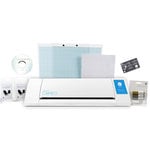
I put my Silhouette Cameo to work and cut the title for this layout. When I placed the title on the layout it didn't stand out as much as I wanted it to, so I outlined it with a black precision pen.
As usual, I used my sewing machine to add some decorative stitching. I added a decorative completely by accident to the bottom of the journaling tag. It was a serendipitous accident because I LOVE how it turned out.
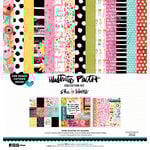
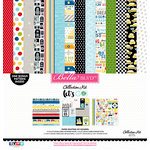
Last but not least, I used the Bella Blvd, Lets Go collection to create this layout. I couldn't resist the bold primary colors in this collection, even though it's a travel collection it worked perfectly.
Thanks for stopping by today! I'm so happy you found your way here. Have a happy Thursday!