Showing posts with label Tiny Prints. Show all posts

Monday, December 1, 2014

DIY Stocking Holder

Whew, we survived all the excitement and family time over Thanksgiving weekend. We had a wonderful time spending the weekend with family and friends. I have some tired kiddos today. It wasn't easy getting them off to school this morning.

Yesterday we finished putting up our Christmas decorations. This year we added new stockings and a new stocking holder. In years past we've just laid the stockings on the couch on Christmas eve (tacky, I know). In our first house, two homes ago, we had a mantle and I've kind of been sad about not having one in our new house (yet, we will someday). This year I decided to come up with a way to display our stockings with our other Christmas decorations. Luckily my husband was able to help me out with this project (a lot)...I don't think he trusts me with a saw. Anyway, Justin and I transformed an old end table into a new stocking holder. Yes, you read that right and old end table into a stocking holder. This end table has been sitting in our basement untouched for a few years. I've had a hard time parting with it because it is part of the very first living room set we purchased after we got married. (Our first "real furniture".)
DIY Stocking Holder by @jbckadams with a tutorial #DIYstockingholder #stockings #Christmasstockings #stockinghanger
I know it's ugly...I don't know why I kept it. I am glad I kept it though because I LOVE how this project turned out!
DIY Stocking Holder by @jbckadams with a tutorial #DIYstockingholder #stockings #Christmasstockings #stockinghanger
 I had Justin take a few pictures along the way while he was putting this together for me. The first thing he did was disassemble the table. Then he started making the base. He made the base slightly larger than the top of the table leg.
DIY Stocking Holder by @jbckadams with a tutorial #DIYstockingholder #stockings #Christmasstockings #stockinghanger
 He had this super smart trick for making the circles perfectly round. He put a nail in the center of the board he was going to cut, tied a string to the nail, and then tied a pencil to the other end of the string. He then drew a perfect circle with the pencil. See, I told you it was a super smart trick. He did this 3 times, adding an inch to the string each time. (The mark left by the nail makes a perfectly centered spot to drill a hole in the smallest circle to center the leg later on.)
DIY Stocking Holder by @jbckadams with a tutorial #DIYstockingholder #stockings #Christmasstockings #stockinghanger
Once he had cut all three circles he ran the router around them. Then, they were ready to be attached to the table leg.
DIY Stocking Holder by @jbckadams with a tutorial #DIYstockingholder #stockings #Christmasstockings #stockinghanger
He screwed the smallest circle to the table leg and each circle after that is screwed to the board on top of it.  If you use recycled table legs like these, they will likely have a mark on the end where they were held on the lathe when they were made, making a great matching hole for the one in the base.
DIY Stocking Holder by @jbckadams with a tutorial #DIYstockingholder #stockings #Christmasstockings #stockinghanger
Here's what they looked like before he painted them. I wanted them painted with * champagne spray paint 
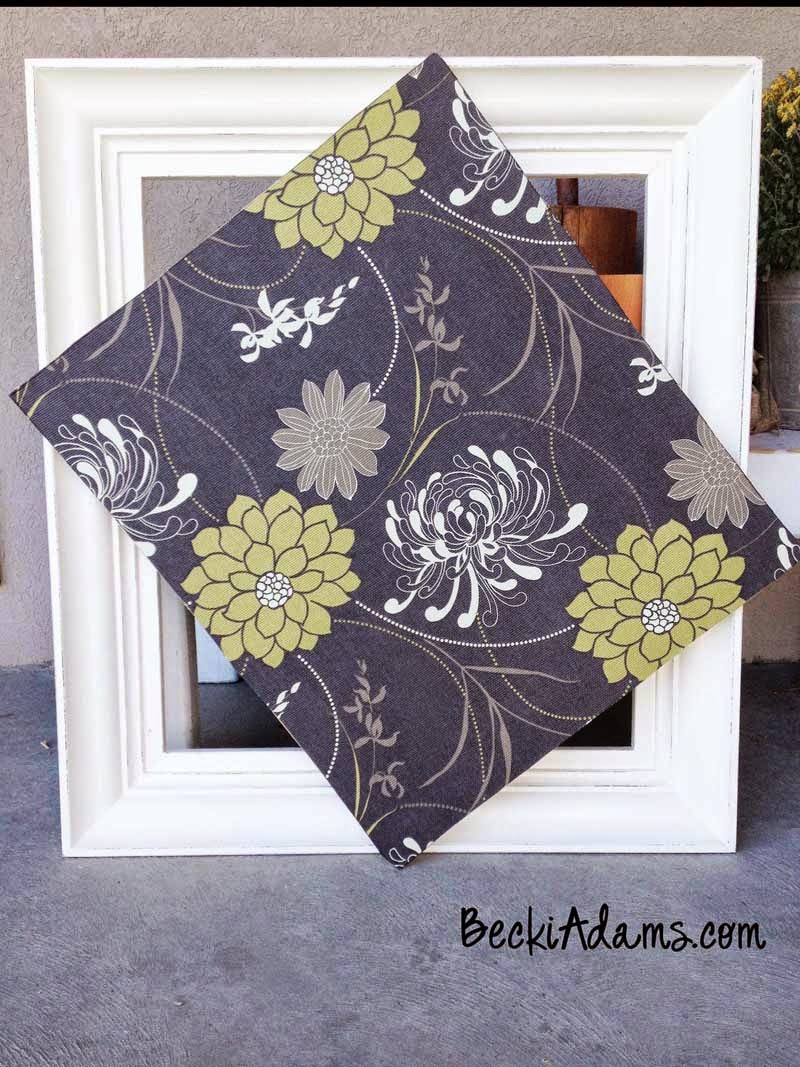
(I like Krylon the best). It's so easy to use and it covers so well. (I used it to paint the picture frame in this post too.)  The final touch was an eye hook at the top of the post to hold a small curtain rod. By the way, if you don't have an extra end table lying around (aka, you're not a pack rat, like me) you can use a * wood spindle.
So, what do you think? I'm kinda loving it...okay, not kinda. I really love how it turned out.
DIY Stocking Holder by @jbckadams with a tutorial #DIYstockingholder #stockings #Christmasstockings #stockinghanger
I know you're wondering where I got those adorable (personalized) stockings. Well, Tiny Prints sent them my way. They have the most adorable new stockings in their store. If you order now you'll get them right in time for your holiday decorations. This is the first time we've had matching stockings and I'm so excited about it. These stockings are made of a canvas type material and are such high quality. I know they'll last for years to come, even with my rambunctious bunch of kiddos. 
DIY Stocking Holder by @jbckadams with a tutorial #DIYstockingholder #stockings #Christmasstockings #stockinghanger
I love that this project is so versatile too. The curtain rod makes it easy to adjust the length (so you can fit a few more or a few less stockings). I chose to put the stocking holder on the top of my piano but it would also be cute on top of a shelf, entertainment center, or even on the floor.
 DIY Stocking Holder by @jbckadams with a tutorial #DIYstockingholder #stockings #Christmasstockings #stockinghanger
How do you display stockings in your home? Do you have a mantle or do you have to be creative with how you hang them? I'd love to see what stockings look like in your home. 
 
(This post contains affiliate links, by purchasing items through these links you will not pay more for any of the items I will just receive a small percentage of the sale. These affiliate links help to keep my blog running and to support my family. Affiliate links are shown with an *)

Friday, November 14, 2014

Personalized Christmas Cards

Hi there, it's the last day of Christmas card week. I hope you like what I've shared with you and that you've been inspired to do something different with your Christmas cards and most importantly you create what is best for you and your family. I'm so excited with the personalized preprinted cards that our family will be sending out this year. I'm so thrilled with the quality of the cards we got from Tiny Prints. I hope our friends and family love them as much as I do.

Today's card is another card that I got from Tiny Prints and embellished to make it a little bit more personal. I added some ribbon and * Glossy Accents to this card.
Personalized Christmas cards created by Becki Adams @jbckadams for @tiny_prints #christmascard #tinyprints #christmas #holidaycard #personalizedchristmascard
 It's really hard to see in the photo but on each of the little berries I put a dot of glossy accents to make the berries shiny and have a little bit of dimension. It was so easy and made such a big difference on the card. The only drawback is that you have to let it dry for a little while. I let mine dry over night just to make sure it was set before I put it in the envelope. Because I put a couple of dots of glossy accents on the inside of the card I let it dry standing up. I just left a whole line of cards on my kitchen table over night and they were ready to go the next morning.

Personalized Christmas cards created by Becki Adams @jbckadams for @tiny_prints #christmascard #tinyprints #christmas #holidaycard #personalizedchristmascard

Personalized Christmas cards created by Becki Adams @jbckadams for @tiny_prints #christmascard #tinyprints #christmas #holidaycard #personalizedchristmascard
I also added a bit of ribbon on this card. The technique I used on this card is similar to the one I did on the card I shared with you on Monday. I simply cut a slit in the the fold of the card so I could thread the ribbon through. Then I tied a bow on the inside of the card under the sentiment. Under that bow I added a black * chalkboard label sticker, just to make the bow stand out a little bit. By adding that sticker I it added another layer of interest to the card.
Here's what it looks like on the backside of the card.
Personalized Christmas cards created by Becki Adams @jbckadams for @tiny_prints #christmascard #tinyprints #christmas #holidaycard #personalizedchristmascard
I also ordered liners for this card. I did this for the same reason that I did on the other cards. I don't want the embellishments to damage the envelope when I mail the card. The liners are every bit as beautiful and of high quality. They are worth every penny!
Personalized Christmas cards created by Becki Adams @jbckadams for @tiny_prints #christmascard #tinyprints #christmas #holidaycard #personalizedchristmascard
 
Thank you for joining me this week. I've had so much fun putting these posts together for you! Feel free to let me know what you think by commenting below or clicking the "contact me" button on the right sidebar to send me an email.

Also, here are the links to the rest of the post for the week, just in case you may have missed any.
(This post contains affiliate links, by purchasing items through these links you will not pay more for any of the items I will just receive a small percentage of the sale. These affiliate links help to keep my blog running and to support my family. Affiliate links are shown with an *)
 

Wednesday, November 12, 2014

Personalized Christmas Cards

It's Wednesday, day three of Christmas card week. My kids are out of school today. The windchill was -20 degrees. That's COLD especially this early in the season. I'm afraid of what the rest of winter is going to bring. It's been a crazy day with me trying to work and juggling six kids (my sister's kids are here too). It's nothing short of a miracle that I was able to accomplish anything today. I will admit that I did turn on a movie for them and shut my bedroom door to finish things up for today's post.

Today I have another preprinted Christmas card from Tiny Prints. Today I'm working with the Joyful Chic Christmas card. This card has room for tons of photos and I used all the spots for photos. On the front of this card just above the "Merry" I wanted to add a little bit of embellishment.
Personalized Christmas cards by Becki Adams @jbckadams #christmascards #personalizedChristmascards #TinyPrints
In order to have them all match I cut out embellishments using my * Silhouette Cameo and * scalloped circle punch. I use these two tools all the time when I need multiples of embellishments. I cut the deer head using * gold Pow glitter paper from American Crafts. I cannot tell you how much I love this stuff! It has all the sparkle of glitter but it does not make a mess like most glitter papers. Seriously, I had my Silhouette on my kitchen table and there was not one single flake of glitter anywhere. It's worth every penny. I need to get some more ordered for some Christmas projects. The teal paper is from the * Pebbles Home+Made collection. I've used this collection over and over. It's one of my all time favorite collections.
After I had all my pieces cut out I layered them on the front of the card. I just used a little bit of adhesive on each piece. You could use * glue dots, liquid glue (I prefer * Tombow liquid adhesive ), or even * pop dots .
On the inside of the card I added a strip of gold washi tape to the bottom of the card to bring a little bit of gold to the inside of the card.
Personalized Christmas cards by Becki Adams @jbckadams #christmascards #personalizedChristmascards #TinyPrints
 The back of the card also has a photo of our family.
Personalized Christmas cards by Becki Adams @jbckadams #christmascards #personalizedChristmascards #TinyPrints
I'm so excited to send these cards out. I know our friends and family will love them. Tiny Prints has so many choices and the quality of the cards is amazing. I wish each of your could feel these cards. It's truly impressive!
Personalized Christmas cards by Becki Adams @jbckadams #christmascards #personalizedChristmascards #TinyPrints

Again, because I was adding embellishments to the cards I ordered the liners so that the embellishments won't poke through the envelopes (and they're just pretty).
Personalized Christmas cards by Becki Adams @jbckadams #christmascards #personalizedChristmascards #TinyPrints

If you missed day one and day two of Christmas card week make sure you go back and check them out. I'm sure you'll love them!
So, get started on your Christmas cards. Get them done early so you're not like me and standing in line at the drug store picking up cards that you ordered from one hour photos.
See ya tomorrow!
(This post contains affiliate links, by purchasing items through these links you will not pay more for any of the items I will just receive a small percentage of the sale. These affiliate links help to keep my blog running and to support my family. Affiliate links are shown with an *)

Monday, November 10, 2014

Personalized Christmas Cards

Typically I am the one in line at the drugstore on the 17th of December waiting in line at the one hour photo counter. Waiting for the Christmas cards that I uploaded an hour earlier with the most recent snapshots I could find of our kids (on rare occasion I've found a family photo) to include. Why do I put this task off until the last minute? Well, it's not intentional. Every year about this time I start thinking about Christmas cards. I really do, I love Christmas cards! They make me so happy when I find that one has landed in my mailbox and I hope that finding a Christmas card from our family in the mailboxes of friends and family makes them happy too. As a scrapbooker/papercrafter I feel obligated to create the most beautiful handmade cards. (Heaven only knows I have enough pretty paper to make hundreds of cards.) In November I get some plans made for handmade Christmas cards and then...I blink and Christmas is a week away. I know that's not how it really happens but November and December go by so quickly!
This year, I just gave in. I'm not looking at it as a failure because I don't have amazing handmade Christmas cards to send out. I'm looking at it as a success because I've finally learned my limitations. I ordered my Christmas cards from Tiny Prints and they've already arrived. I ordered a few different cards and I'm personalizing each one just a little bit.
This week (November 10th-November 15th). I'll have a new post here each day about Christmas cards. I've prepared posts about handmade cards, about preprinted cards and a few things in between.
The first card I have to share with you is a preprinted square card that I ordered from Tiny Prints. First of all I should tell you a little bit about the Tiny Prints cards...they are beautiful!!! Because I am a papercrafter I'm picky about the quality of the paper and the quality of the photos printed on the paper. I was not disappointed with the quality of these cards I was thrilled! They're printed on very heavy cardstock with a beautiful matte finish.
Personalized preprinted Christmas Cards by Becki Adams #ChristmasCards #Cardmaking #Papercrafting #PersonalizedChristmasCards

 I decided to personalize this card just a little bit by adding some black ribbon right below the photo.
Personalized preprinted Christmas Cards by Becki Adams #ChristmasCards #Cardmaking #Papercrafting #PersonalizedChristmasCards

Personalized preprinted Christmas Cards by Becki Adams #ChristmasCards #Cardmaking #Papercrafting #PersonalizedChristmasCards
 I didn't want to wrap the ribbon around the entire card so I cut to small slits on either side of the photo with a *craft knife* and carefully threaded the ribbon through each slit and tied a bow in the front between the sentiment and the photo.
Personalized preprinted Christmas Cards by Becki Adams #ChristmasCards #Cardmaking #Papercrafting #PersonalizedChristmasCards

Because I knew I wanted to add a little bit of embellishment to each card I ordered liners to go in the envelope. I was just as excited about the liners as I was the cards. They are beautiful and so easy to add to the envelope. The liners will make sure that the embellishments won't tear through the envelope. If you're interested in purchasing this specific card you can find it HERE.
Personalized preprinted Christmas Cards by Becki Adams #ChristmasCards #Cardmaking #Papercrafting #PersonalizedChristmasCards

This year on December 17th you won't find me hurrying to get my cards printed, addressed, and sent out. It will already be done! My goal is to have my cards all sent out by December 1st. Do you think I can do it? I've already have half the battle won because I have my cards printed, embellished, and my list made. All I have left to do is address them, put the stamp on, and send them out. I can do that!
Personalized preprinted Christmas Cards by Becki Adams #ChristmasCards #Cardmaking #Papercrafting #PersonalizedChristmasCards

Personalized preprinted Christmas Cards by Becki Adams #ChristmasCards #Cardmaking #Papercrafting #PersonalizedChristmasCards
 (This post contains affiliate links, by purchasing items through these links you will not pay more for any of the items I will just receive a small percentage of the sale. These affiliate links help to keep my blog running and to support my family. Affiliate links are shown with an *)
I'll be sending out an email each day this week with posts all about Christmas cards. Make sure you are signed up for my newsletter so you don't miss anything.


Monday, September 29, 2014

Framed Photo Canvas Tutorial

For the longest time I've wanted a big family photo to hang in my living room. I'm sure you know that a big family photo usually comes with a big price tag. Finally, I decided that I wasn't going to wait anymore and I was going to create a big family photo to go in our living room. It started a few months ago with us taking a family photo ourselves. We took the tripod and several pose ideas that I found on Pinterest. My husband and I staged the photo following the poses that I had pinned and we used the timer and once everyone was in place my hubby ran, hit the shutter button, and then ran back into place. A lot of the photos we took weren't ones that we wanted to hang on the living room wall but we did get one good one.
With that good photo I headed over to the Tiny Prints website and ordered a 16x20 canvas. I was a little bit nervous about the quality of the canvas. I'd never ordered a canvas before and I knew  that if the canvas wasn't high quality my photo would look terrible. My worry was unnecessary. When the canvas landed on my doorstep I was so excited thrilled with how it turned out! I couldn't wait to finish the project.
 I enlisted the help of my husband to build a frame for me. (You could easily purchase a Picture Frame and eliminate the building process in this project.) I wanted to have a 4" 'mat' around the canvas print, so first he made a flat frame with outside dimensions of 27-1/4" x 31-1/4" using 1" thick x 1-5/8" wide lengths of wood.  Once this was built, he attached 4-1/4" crown molding to the flat frame, leaving 1" of the flat frame showing on all sides.  The back of the frame was made from a piece of 1/4" thick material (either MDF or Plywood will work). This piece was temporarily nailed into a 1/4" groove cut into the backside of the flat frame to hold the entire frame square while the glue dried. Once this was done, he puttied the holes and joints and then finish sanded the whole thing.

Once he was finished building the frame he also painted it for me (he's the BEST! I don't know what I would do without him!). He painted it a dark chocolate brown first
and then painted it with 3 coats of an off white paint. He distressed the edges a little bit. It was at this point that I got excited *really* excited.
 I took the canvas with me to a local discount fabric store that sells tons of decorator fabrics for cheap. (I could spend hours in that store, it's my go to spot for decorator fabric.)
I only paid $7.99 a yard for really great quality, beautiful fabric. I actually bought 2 pieces of fabric and had a really hard time choosing which fabric I would use for this project. (I will use the other one in a future project.)
I even enlisted the help of my facebook and instagram friends to help me make the choice. I thought about using both fabrics, but in the end I decided to finish the project using just one fabric.
We adhered the fabric to the back of the frame with spray adhesive and then adhered the back board to the back of the frame.
*Tip: Make sure to spray the fabric AND the back of the frame with adhesive and let it dry for a few minutes before sticking them together.
 After we glued the fabric to the back of then we attached the back to the frame with 18 gauge pin nails.

And with the the project was finished...I  LOVE love LOVE it! It makes me smile every time I walk into my living room.

 It seriously makes me so happy!


BLOGGER TEMPLATE BY DESIGNER BLOGS