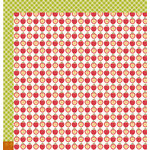
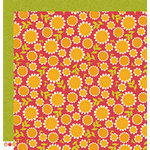
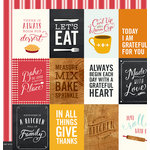
- My Crazies is a project I created for Bella Blvd. It's all about designing with circles.
Tuesday, December 29, 2015
Top 10 Scrapbooking Projects of 2015
Welcome! Thank you for stopping by for the Top 10 Scrapbooking Projects of 2015 Blog Hop. I hope you've arrived here from the fabulous Chantalle McDaniel's blog. 2015 has been a fun, busy, exciting year for me in the scrapbooking world. I've had so many great opportunities and fun projects. I hope you'll enjoy reviewing a few of my favorites with me.
Monday, November 16, 2015
Only One Week to Go...
When I started my journey scrapbooking professionally never in my wildest dreams did I think that I would ever end up teaching others how to scrapbook. I thought that I would never have anything to say that anyone else would want/need to hear. I'm not sure of the exact moment when that all changed but it did. It changed in a big way.
Teaching scrapbooking classes is something that I LOVE and something that I know I need to be doing, right now. I truly do feel that somewhere along my journey I do have something to say that others need to hear. When Big Picture Classes changed their platform to a membership program I knew that I wanted to be a part of their program. I nervously reached out to them and sent them my application. I was terrified to push the "send" button on that email. I'm so glad that I did. They accepted my application and my class ideas. My first class with them is called, Line it Up. I've had this class/concept in my head forever. This was my first "light bulb" moment when entered the online scrapbooking world. This class covers basic design principles and guides the students through how to make their layouts shine.
Teaching scrapbooking classes is something that I LOVE and something that I know I need to be doing, right now. I truly do feel that somewhere along my journey I do have something to say that others need to hear. When Big Picture Classes changed their platform to a membership program I knew that I wanted to be a part of their program. I nervously reached out to them and sent them my application. I was terrified to push the "send" button on that email. I'm so glad that I did. They accepted my application and my class ideas. My first class with them is called, Line it Up. I've had this class/concept in my head forever. This was my first "light bulb" moment when entered the online scrapbooking world. This class covers basic design principles and guides the students through how to make their layouts shine.
Thursday, November 12, 2015
Tuesday, November 10, 2015
Come Listen to My First Podcast
It's my birthday! To celebrate my birthday (just kidding, it was actually a fun coincidence) I have something fun to share. Recently, I found the ScrapGals podcast. As you know, I fall head over heels for anything scrapbooking related. I love this podcast because it feels like I'm listening into a great conversation between friends about their favorite hobby. I had only listened to a couple of episodes when I got a message from Tracie Claiborne asking if I would like to chat with them on an upcoming podcast. My first thought was "No, way!! That's way too scary. What if I sounded like an idiot? OR what if I couldn't answer their questions? Ack!"
Monday, November 9, 2015
Scrapbooking Children's Favorites
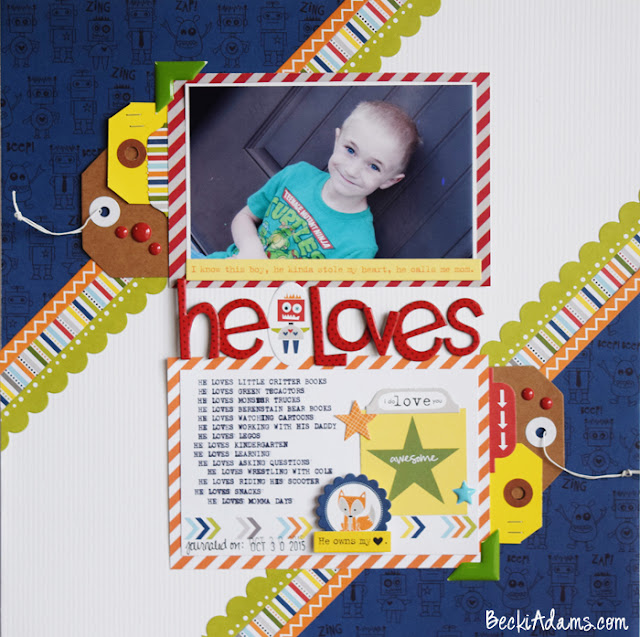
Hey, happy Monday! Last week I was up on the Bella Blvd blog with a layout about my little man's favorite things. Scrapbooking children's favorites has always been something that I've done. Periodically I will have my kids make a list of their current favorites or if they're too little I make it for them. Occasionally I will add a few photos of their favorite things but usually I simply add a current photo of them and list their favorite things.
If you follow me on Instagram (if you don't, you should) you know that I recently came home with a vintage typewriter from a flea market. I've wanted one for years but I haven't been able to find the perfect one. This is the first layout I created with my new typewriter. I used the typewriter to create the journaling on a 4x6 journaling card from the Bella Blvd Max collection.
Thursday, November 5, 2015
Stamped Thanksgiving Cards
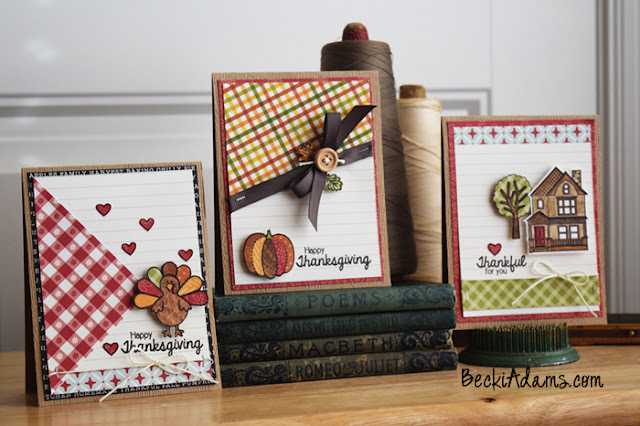
If you're a regular visitor of my blog you know that I'm not much of a stamper. I love the look of stamps. I try to make them work for me but I'm just not good at it. Today, I changed that. I created some adorable stamped Thanksgiving cards for the Scrapbook Expo blog. Yes, I actually did it!
My sweet friend Mendi recently started her own company called Sunny Studio. Mendi is so sweet, she's one of my online friends that I would LOVE to meet someday. She has the most adorable stamps and dies. I used a couple of her stamp sets to create these fun Thanksgiving cards. I mixed these stamps with the Pebbles Harvest collection. I used a basic black ink
 and an acrylic stamping block. It's also important to have a pair of really sharp scissors
 . The "thankful for you" card on the far left is colored with Tombow markers
  .
.
Make sure to stop by the Sunny Studio to get your own stamps. You'll love them, I promise! and then Hop on over to the Scrapbook Expo blog and check out how I created these cards.
I have to admit, I'm pretty excited that I have a stamping success. Is there a particular tool or design that you struggle with?
(This post contains affiliate links, by purchasing items through these links you will not pay more for any of the items I will just receive a small percentage of the sale. I will never recommend products that I don't love. All opinions of products I provide links for are my own regardless of whether I am paid for providing the link. These affiliate links simply help to keep my blog up and running.)
My sweet friend Mendi recently started her own company called Sunny Studio. Mendi is so sweet, she's one of my online friends that I would LOVE to meet someday. She has the most adorable stamps and dies. I used a couple of her stamp sets to create these fun Thanksgiving cards. I mixed these stamps with the Pebbles Harvest
Make sure to stop by the Sunny Studio to get your own stamps. You'll love them, I promise! and then Hop on over to the Scrapbook Expo blog and check out how I created these cards.
I have to admit, I'm pretty excited that I have a stamping success. Is there a particular tool or design that you struggle with?
(This post contains affiliate links, by purchasing items through these links you will not pay more for any of the items I will just receive a small percentage of the sale. I will never recommend products that I don't love. All opinions of products I provide links for are my own regardless of whether I am paid for providing the link. These affiliate links simply help to keep my blog up and running.)
Tuesday, November 3, 2015
DIY Thanksgiving Banner
Thanksgiving is my favorite holiday...I think I've mentioned that before. Last year, I created this fun DIY Thanksgiving banner. I love spending time with family around a big meal and not having to worry about gifts, costumes, or anything else; just family and lots of food. I keep my Thanksgiving decor simple. Most of my Thanksgiving decorations are DIY projects.
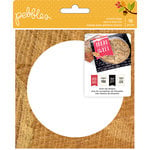
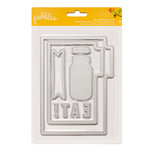
I gathered a few things from around the house and a few things from the Pebbles Home+Made collection by Jen Hadfield of Tatertots and Jello. I grabbed a few sheets of the Home+made Burlap Cardstock . This burlap is SO much fun to work with. If you haven't played with it yet, you really need to! I cut the burlap into a pendant shape using the Pebbles Homemade Dies (Banners)
 . I cut the sheet of 12x12 burlap in half so that it would fit in my manual die cut machine
 .
.
After I had all the pendant shapes cut out I grabbed an old paperback book that I rescued from the discard pile at the library. I tore a few pages out of the book and then cut them to the length that I needed.
I wanted the burlap to hang just a little bit lower than the book page
Then I cut the teal portion using the die set too.
I gathered a few things from around the house and a few things from the Pebbles Home+Made collection by Jen Hadfield of Tatertots and Jello. I grabbed a few sheets of the Home+made Burlap Cardstock
After I had all the pendant shapes cut out I grabbed an old paperback book that I rescued from the discard pile at the library. I tore a few pages out of the book and then cut them to the length that I needed.
I wanted the burlap to hang just a little bit lower than the book page
Then I cut the teal portion using the die set too.
share: facebook | twitter | pinterest
Labels:
home decor,
home+made collection,
Pebbles,
Thanksgiving
Thursday, October 22, 2015
How to create a layout with a LARGE title
It's been a while since I shared with you my posts on the Scrapbook Expo blog. I blog for them every Thursday. This Thursday my post is titled: "How to create a layout with a LARGE title". There's also a process video to go along with this layout.
I've got a funny story about this video. When I prep for a video I put the main elements of the layout together without adhering anything, just to make the filming process move more smoothly. Basically, I get all my products together. The title of this layout is: Evidence. The first time (yes, there was more than one filming of this project) I spelled "Evidence" wrong. It was later at night and I was exhausted. When I finished filming I told my husband that something "just didn't look right" about this layout. He looked at me, smiled, and said, "you spelled the title wrong." Of course the LARGE title on this layout was the main focus and couldn't be fixed. So, I tore the layout apart and filmed it again....spelling (spelling the title correctly this time).
Here's a sneak peek of the layout:
What are you Doing Tomorrow Night?
Tomorrow is FRIDAY, what are you doing tomorrow night? I'm going to be in my PJ's with a cup of hot chocolate ...maybe some popcorn
 and I'll be hanging out with True Scrap attendees. We'll be having fun, laughing, and getting ready for tomorrows True Scrap Event. I can't wait! This is my favorite scrapbooking event of the YEAR! As I mentioned earlier this week, I'm thrilled to be a True Scrap instructor. I've had teaching at this event on my bucket list for a LONG time. I'm so excited to have finally reached this goal! Here's what you'll be learning in my class:
Wednesday, October 21, 2015
Tips for Making your own Halloween T Shirts
Recently I took a (small ;) step away from my paper, scissors, and glue and played with heat transfer vinyl. Today I'm sharing tips for making your own Halloween t shirts.
I used my Silhouette Cameo and glow in the dark heat transfer vinyl and gold glitter heat transfer vinyl to create these cute Halloween t shirts for my kiddos. I get all my vinyl from Expressions Vinyl. They have the best quality and THE best customer service. Love them!!!
I started by cutting the shapes from the Silhouette store. Tip #1 remember to reverse your images by using the mirror function before you cut.
After I cut the vinyl and removed the negative pieces, I was left with vinyl that was ready to be ironed onto my kids black t shirt .
.
The words will be backwards (that's a good thing, right now).
Are you ready for tip #2? It's a good one... Tip #2 Use a piece of parchment paper on top of your vinyl. This will prevent any residue from sticking (and making a huge mess of) your iron
 .
.
I put my iron on medium heat (Tip #3 make sure to press down firmly with your iron onto the vinyl) while I was adhering the vinyl. At the end of this project I had 2 HAPPY kids. I didn't get a picture of the shirts glowing in the dark. My kids were way too busy for that nonsense. They are awesome in the dark, especially the t-rex.
I have a little girlie who is pretty good about her momma constantly taking her picture.
Then....there's my little man. He's not as happy and cooperative when I need a photo. Just after I got him in his brand new fancy t-rex shirt he ran out and played in the sandbox (hence the not so clean shirt in the photo).
He may not be the most cooperative model but I still like him...lots!
Hurry, you've got just enough time to get your supplies and get some t-shirts made...your kiddos will love you and do their chores without complaining. Okay, that may be pushing it but I did get a clean kitchen out of this deal.
Thanks for stopping by today!
(This post contains affiliate links, by purchasing items through these links you will not pay more for any of the items I will just receive a small percentage of the sale. These affiliate links help to keep my blog running, thanks for your support.)
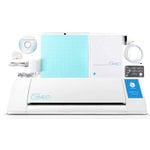
I used my Silhouette Cameo
I started by cutting the shapes from the Silhouette store. Tip #1 remember to reverse your images by using the mirror function before you cut.
After I cut the vinyl and removed the negative pieces, I was left with vinyl that was ready to be ironed onto my kids black t shirt
The words will be backwards (that's a good thing, right now).
Are you ready for tip #2? It's a good one... Tip #2 Use a piece of parchment paper
I put my iron on medium heat (Tip #3 make sure to press down firmly with your iron onto the vinyl) while I was adhering the vinyl. At the end of this project I had 2 HAPPY kids. I didn't get a picture of the shirts glowing in the dark. My kids were way too busy for that nonsense. They are awesome in the dark, especially the t-rex.
I have a little girlie who is pretty good about her momma constantly taking her picture.
Then....there's my little man. He's not as happy and cooperative when I need a photo. Just after I got him in his brand new fancy t-rex shirt he ran out and played in the sandbox (hence the not so clean shirt in the photo).
He may not be the most cooperative model but I still like him...lots!
Thanks for stopping by today!
(This post contains affiliate links, by purchasing items through these links you will not pay more for any of the items I will just receive a small percentage of the sale. These affiliate links help to keep my blog running, thanks for your support.)

Subscribe to:
Comments (Atom)


